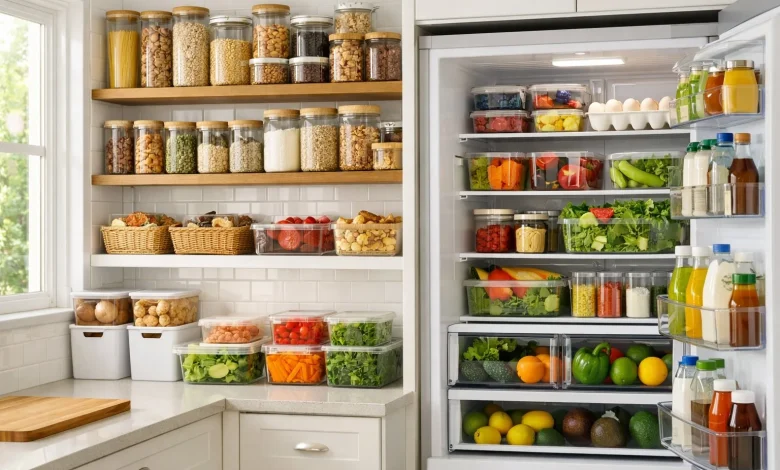
Most pantry infestations do not begin with a dirty kitchen. They usually arrive tucked inside a freshly bought bag of flour, a box of rolled oats, or a bulk pouch of rice that sat in a warehouse or delivery truck alongside microscopic eggs. Once that package lands on a crowded shelf behind half-open cereal boxes and folded paper bags, warmth and stillness do the rest. Within a few weeks, tiny moths flutter out when you open the cabinet door, or grain beetles show up in ingredients you assumed were completely sealed.
True pest prevention in a pantry has far less to do with emergency spraying and far more to do with how dry goods are stored, rotated, and inspected from day one. A thoughtfully organized pantry removes the two things stored-product pests need most: easy access through thin packaging and forgotten corners where populations can multiply unnoticed. When your layout makes every container visible, airtight, and easy to rotate, you stop infestations before they can spread beyond a single item.
Why Standard Grocery Packaging Fails in the Pantry
Paper flour sacks, cardboard pasta boxes, and thin plastic snack bags are built for short-term shipping and shelf display, not long-term household protection. Folded paper tops leave narrow gaps at the corners, and glued cardboard flaps rarely close flat once opened. Even unopened plastic bags can have tiny pinholes or weak heat seals that give pantry pests an effortless entry point.
Many common pantry insects—including Indianmeal moths, sawtoothed grain beetles, flour beetles, and drugstore beetles—can chew directly through paper, foil-lined pouches, and lightweight polyethylene film. A rubber band or plastic bag clip keeps snacks from spilling, yet it does almost nothing to block an insect or contain larvae that may already be inside the package. Decanting vulnerable foods into rigid, gasket-sealed containers is the single most effective physical barrier you can put between your groceries and the rest of your pantry.
What to Decant First and Which Containers Actually Work
Not every item in a pantry carries the same risk, so focusing your container budget on high-vulnerability dry goods yields the best results without turning grocery day into an hours-long chore. Grains, flours, baking mixes, dried beans, lentils, nuts, seeds, dried fruit, loose tea, spices, and dry pet food sit at the top of the list. Even birdseed or decorative corn stored near kitchen shelves should be sealed tightly, since those items frequently harbor moth or weevil eggs.
When choosing containers, prioritize true airtight seals over decorative lids. Look for heavy-duty glass jars with silicone gaskets and clamp or threaded metal lids, or thick-walled BPA-free food-grade plastic canisters with continuous silicone rings and locking latches. Thin acrylic canisters with loose push-on lids often warp slightly over time, leaving hairline gaps wide enough for newly hatched larvae to slip through.
Clear sides matter just as much as tight lids. Transparent glass or plastic lets you spot clumping, fine webbing, powder trails at the bottom of a jar, or live insects during a quick glance across the shelf. Keep container shapes consistent—square or rectangular modular canisters maximize shelf depth and prevent wasted dead space where crumbs and stray grains tend to collect.
A Smart Shelf Layout That Eliminates Hidden Breeding Zones
Clutter is an ally to pantry pests because deep, overcrowded shelves hide aging packages for months or years. Organizing by zone and visibility keeps air circulating, makes spills obvious immediately, and stops forgotten bags from becoming silent breeding hubs.
High-Risk Staples at Eye Level
Place flours, grains, cereals, baking supplies, and snacks right at eye and chest level where you look every day. Grouping these items in clear canisters on shallow shelves or pull-out trays ensures nothing gets pushed behind taller boxes. If you use deep cabinets, clear turntables or low-sided acrylic bins allow you to slide an entire category forward in one motion rather than digging blindly into the back corner.
Bulk Backups and Less-Used Ingredients
Reserve upper shelves for unopened backup supplies, canning jars, and seasonal baking ingredients, keeping them inside sealed tote bins if they remain in original store packaging. Never mix newly purchased flour or grains directly on top of older stock inside a canister. Finish the remaining portion first, wash and thoroughly dry the container, and then pour in the fresh batch so older food never stays trapped at the bottom.
Floor-Level Bins and Non-Food Items
Keep bottom shelves clear of loose cardboard boxes sitting directly on the floor or cabinet base, where humidity tends to linger. Store heavy root vegetables like potatoes and onions in ventilated baskets away from dry grains, since moisture from produce raises local humidity and attracts pests. Pet food, grass seed, or charcoal bags belong in separate rigid, latching bins rather than open sacks tucked beside human groceries.
Habits That Stop Hitchhikers Before They Reach the Shelf
Even the cleanest pantry can be breached if infested groceries go straight onto the shelves. Building a quick intake routine catches problems at the door:
-
Inspect packaging at the store and before unloading: Pass over bags with tiny holes, crushed corners, fine dust on the outside, or sticky residue near seams.
-
Freeze high-risk items for four days: Placing newly bought whole-grain flours, cornmeal, nuts, dried fruit, and specialty grains in a freezer at 0 degrees Fahrenheit for at least 96 hours kills hidden eggs and larvae before they enter your pantry. Let packages warm to room temperature on the counter before decanting so condensation does not form inside the jar.
-
Label with purchase or fill dates: Use removable painter’s tape or an erasable marker on the bottom or lid of each canister so you always know which batch to use first.
-
Wipe spills and crumbs immediately: A dusting of flour or spilled sugar in a shelf track feeds wandering beetles and moths. Vacuum shelf corners and wipe surfaces with warm soapy water or diluted white vinegar during routine kitchen cleanups.
What to Do If You Spot Early Signs of Trouble
Finding a single moth or a small cluster of beetles does not mean you need harsh chemical sprays near your food. Start by emptying the affected shelf completely and inspecting every jar, lid thread, spice cap, and nearby package. Discard anything showing webbing, clumping, tiny round exit holes in beans or pasta, or live insects, sealing the waste in a tied plastic bag and taking it straight to an outdoor trash bin.
Next, vacuum every crack, shelf peg hole, and hinge in the cabinet, since larvae often crawl into tiny crevices to pupate away from food sources. Wash shelves with warm soapy water, dry them thoroughly, and place pheromone moth traps if you spotted flying moths, remembering that traps only catch adult males and work best alongside a full cleanout.
When airtight storage, smart shelf zoning, and simple grocery-day habits work together, pantry organization becomes far more than a tidy aesthetic. It turns your shelves into a self-defending system that protects your food budget, cuts down on waste, and keeps every ingredient fresh and ready to cook.